Showing posts with label microsoft. Show all posts

Sunday, 2 August 2015

Windows 10 is now rolling out to millions of users around the world, in fact, our early report shows that over 67 million computers have been upgraded in the first three days. Now, if you are an advanced user or if you have been running an installation of Windows for quite some time, you probably want to perform a clean installation of the new operating system.
A clean installation of the operating system, in this case Windows 10, involves formatting the hard drive. This process will delete everything on your computer, so basically you'll be starting from scratch. This process also means that you will have to restore your personal files from a backup, and you'll have to reinstall all your applications.
Although performing a clean installation could be considered one of the most time-consuming process to set up Windows, it's also the process that give you a peace of mind that everything should work as advertised.
While starting from scratch with Windows 10 technically remains unchanged from previous versions, because Microsoft is offering the operating system as a free upgrade, the overall process is a little tricky. As such in this new how-to guide, we're going to go through the instructions to help you upgrade to Windows 10 from Windows 7 or Windows 8 and remain activated

Note, it's worth pointing out that the best way to make the jump to Windows 10 is by reserving the free upgrade using the "Get Windows 10" app. This process will ensure that every component in your system is compatible with the new operating system.
Before moving forward, it's recommended that you perform a full backup of your system in case something goes wrong. You can refer to my previous how-to guide on how to do a system image backup.
Also, you will want to download the latest device drivers available for your computer before upgrading. You want to do this in case after the installation some of the components, such as network adapter and graphics, are not detected during the installation. Below, you'll find a list with the most common PC manufacturers where you can download the latest drivers:
If you need more information on how to prepare for Windows 10, you can also check this previous guide. There you'll find minimum system requirements information and various helpful tips.
It's important to note that even though Microsoft is offering Windows 10 as a free upgrade for users running a genuine copy of Windows 7 and Windows 8, the company is also allowing users to perform a clean installation. However, the only catch is that you must upgrade your current operating system to Windows 10 via Windows Update first, before you can do a clean install. This is to ensure your current product key gets converted to a Windows 10 product key and that your copy of the operating system remains activated.
If you try to do a clean installation without going through the upgrade process first, chances are that you will have problems trying to activate Windows 10 – So, you have been warned!

Know your Windows 10 product key

To perform a clean installation of Windows 10, you'll be needing your product key to activate, as such you want to make sure you know this information before doing anything else. There are various tools and methods to recover your product key, I personally like to use the Magical Jelly Bean Keyfinder tool. This is a free tool that is easy to download and use. (During the installation of the tool, make sure to select the custom installation and remember to uncheck the installation of additional add-ons.)
Once you run the tool, make sure to export the information to a USB drive and/or write down the product key on a piece of paper.

Upgrading to Windows 10

Upgrading to Windows 10 can be done in two different ways: you can reserve your free copy using the "Get Windows 10" app, and you'll be notified when the operating system is ready for you to install. Or you can manually download the installation files from Microsoft to perform an upgrade.
If you're downloading Windows 10 manually, when using the "Download Tool" make sure you select your correct version (32- or 64-bit). If you don't know, go to Control Panel\All Control Panel Items\System, and under System type, you'll see what version you need to download.
When you launch the Download Tool, you'll will be given two choices, here you want to use theUpgrade this PC now option, and then follow the on screen instructions. The upgrade process should only take around 20-30 minutes, but the time will depend on your internet connection and hardware in question.
If everything worked as expected, your computer should be activated. To check if your computer is activated, open the Settings app, and navigate to Update & security, and on Activation, you should see "Activation: Windows is activated".

Doing a clean installation of Windows 10

Now that you have upgraded and you're sure that Windows 10 is activated correctly, it's finally time to do the clean installation.
Open your web browser and once again go to this Microsoft support page to download Windows 10. Once you're in the "Download Tool", choose the Create installation media for another PC option to create either a USB bootable media or an ISO file that you can burn later on a DVD. If you choose to make a USB, you'll need a USB drive with at least 3GB of storage.
During this process, you have to make sure you choose the correct language, architecture (32- or 64-bit), and edition. If you don't know, go to Control Panel\All Control Panel Items\System to get this information.
Once you have created your installation media, reboot your computer with the USB drive or DVD you just created. During the reboot access your system BIOS to make sure you can boot from media with the Windows 10 installation files. (Note: The process to enter the BIOS will vary from PC-to-PC, so make sure to check your manufacturer support website to learn more on how to do this.)
Alternatively, most computers today offer an option during boot to access a boot menu, usually this involves pressing one of the functions keys, such as "F12". If you have this option, you don't need to change the BIOS settings.
If everything is going as expected, you should see the Windows Setup. Click Next, and then Install Now. At this point, you need to enter the product key, you can skip this step, but entering the product key now will ensure you're installing the correct edition of Windows 10.
Click Next, accept the licensing terms, and click Next again. Now, you want to pick the Custom: Install Windows only (Advanced) option to perform a clean installation.
Select and delete any partition on the hard drive that you have currently Windows installed. After deleting all the partitions, usually on "Drive 0", select the empty drive and click Next.
Now the installation process will begin, so you can now grab a cup of coffee and wait until the installation is complete. Then you'll be presented with the out-of-box experience to configure your installation. Here simply follow on the screen directions to configure Windows 10 to your needs. During the configuration process you'll be prompted to use a Microsoft Account, so make sure you have this information ready. You can also create a local account, but if you go this way, you won't be able to take advantage of many Windows 10 features and you won't be able to access the Windows Store to download apps.
After the configuration, the setup will complete any remaining process, and then you'll be presented with the new Windows 10 desktop.
You done it!
Quick tip: now that you in Windows 10, make sure to open the Settings app, go to Update & securityto check for updates and to make sure your computer is activated. Also go to Device Manager and double-check if you need to install any additional drivers. You can also launch the new Windows Store and check for Windows App updates to make sure you are using the latest services. Finally, restore your data from backup and reinstall all your applications.

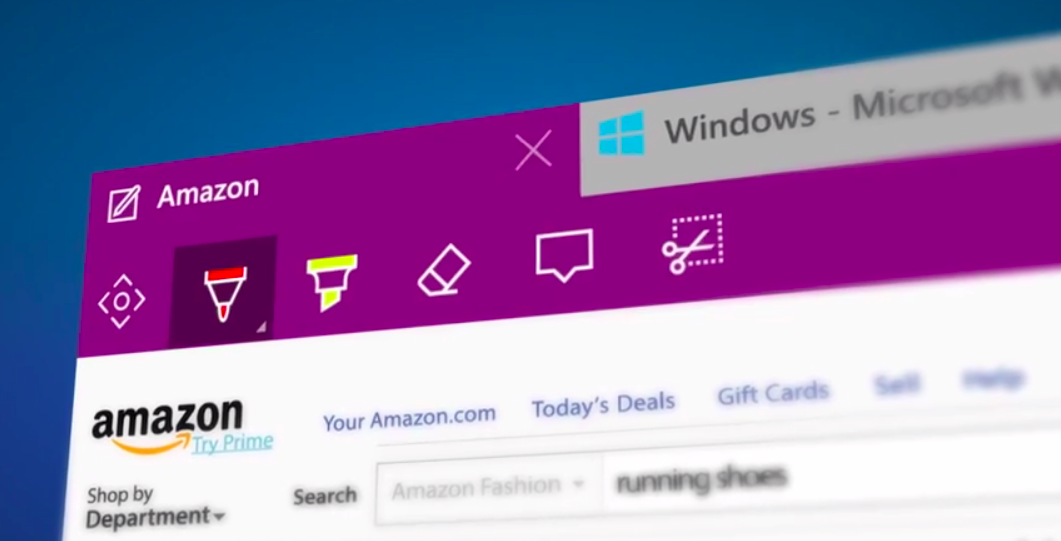
WhatsApp's web extension — through which you can send and receive messages directly from your browser — currently works on Chrome, Firefox, Opera and Safari (on the Mac), with official support not yet available for Microsoft Edge or Internet Explorer. That's set to change shortly, as a Microsoft program manager revealed that discussions were underway in bringing WhatsApp Web to the Edge

There isn't a timeline available as to when we'll see the feature supported on the Edge browser, but those among us that extensively use WhatsApp will be glad to know that Microsoft is working on the issue. We'll let you know once we hear more.
How to access GodMode hidden feature in Windows 10

How to guide for accessing GodMode hidden Windows system tweaks in Windows 10

Now you can easily access the far flung features and customization options of Windows with its secret GodMode feature, which works in its latest version as well.

Users who love to give a more customized touch to your PCs might already be aware of the GodMode feature of Windows.

Well, GodMode is not a new thing to the IT professionals and they often prefer to create the GodMode folder whenever they want an easy access to the far flung tweaks and customization options of Windows on their desktop.
However, very few non IT professionals and everyday users of PC are actually aware of this legendary hidden feature of Windows and the good news is that the feature works in Windows 10 as well.

What is GodMode:

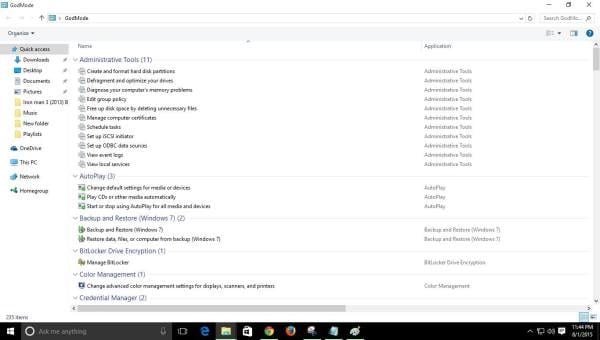
Basically, GodMode draws all the Windows system tweaks and customization options of Windows’ together into a single interface and sorts them into different categories such as Administrative Tools, Display and many more. For instance, if a user wants to adjust the resolution of monitor or make changes to any folder options or say customize the notification area in task bar then all this can be easily accomplished through God Mode folder.
In short user can easily access all windows settings from one place.
You can take control of all secret settings of your OS with just a few clicks.
The amazing beauty of this secret tool is that GodMode works on the current Microsoft offering, the new launched Windows just as beautifully 

Follow the below steps to enter GodMode:

  • Create a ‘New folder’ in your local drive (C drive). In the desktop, right click and select New>Folder.
godmode 1
  • Once you create the New folder, right click on the folder, you will get “Rename” option.
  • Copy and paste the following text as the new name of the folder:  GodMode.{ED7BA470-8E54-465E-825C-99712043E01C}
  • Now hit Enter.
  • The folder will convert into a icon which would mimic the look of a Control Panel.This icon has all Windows settings.
How to guide for accessing GodMode hidden Windows system tweaks in Windows 10
  • Click this icon and you will see different tweaks types such as Administrative tools, Auto Play etc.
  • You can easily move the GodMode folder into any other folder for your convenience, in case you feel the GodMode folder creates a mess on your local drive.
  • One can even pin the GodMode folder to their File Explorer in the taskbar or just put it in the Documents Folder or can even pin it to Windows 8’s modern Start Screen if you are too tech savvy.
How to guide for accessing GodMode hidden Windows system tweaks in Windows 10


The OS itself is worth using, as it includes a ton of improvements over the previous versions and even includes new features like the Microsoft Edge, Cortana, etc.

Keyboard Shortcuts are one of the things which enables the user to have a better interaction with OS. And below is the list of shortcuts that has been included in Windows 10.

Generalised shortcuts

Windows Key+K – Opens the Connect quick action
Windows Key+I – Opens Settings
Windows Key+E – Opens File Explorer
Windows Key+H – Opens the Share charm
Windows Key+T – Lets users navigate through apps on the task bar
Ctrl+Shift+Esc – Launch Task Manager
To check out Activity Center

Windows Key+A – Opens Action center
Windows Key+V – Lets users navigate through notifications
Windows Key+Shift+V – Lets users navigate through notifications in reverse order
Windows Key+B – Lets users set focus in the notification area
To explore Cortana

Windows Key?+S – Opens search
Windows Key?+C – Opens Cortana in listening mode
To use Microsoft Edge

Ctrl+D – Adds current site to favourites or reading list
Ctrl+J – Launches downloads pane
Ctrl+I – Opens favourites pane
Ctrl+H – Opens history pane
Alt+C – Launches Cortana
Ctrl+Shift+R – Enables users to enter reading view
F12 – Launches F12 Developer Tools
F7 – Switches caret browsing on for current tab
Ctrl+K – Opens duplicate tab
Ctrl+Shift+P – Opens new InPrivate Browsing window
For Virtual Desktop usage

Windows Key+Ctrl+D – Adds a virtual desktop
Windows Key+Ctrl+Right arrow – Lets users switch between virtual desktops created on the right
Windows Key+Ctrl+Left arrow – Lets users switch between virtual desktops created on the left
Windows Key+Ctrl+F4 – Closes current virtual desktop
Windows Key+Tab – Opens Task view
Open Gaming bar

Windows Key+G – Opens Game bar upon launching a game
Windows Key+Alt+G – Records the last 30 seconds
Windows Key+Alt+R – Begins recording
Windows Key+Alt+Print Screen – Captures game screenshots
Windows Key+Alt+T – Displays/hides recording timer. Don’t forget to vote in the Poll Below.

Saturday, 1 August 2015

Microsoft recently made available a new preview of Windows 10 Mobile (build 10080) through the Fast ring of updates with a bunch of new changes.
It's the first preview of the universal version of Office apps, and starting with build 10080 the operating system now expands to new phone headsets, including the Lumia Icon/Lumia 930, Lumia 640/Lumia 640 XL, and HTC's One (M8), which is the first non-Lumia phone joining the Windows 10 preview program.
Although, now more users can get access to Windows 10 Mobile preview and get their hands of on the new preview of Word, Excel, PowerPoint, and OneNote, Microsoft warns that there is asignificant number of bugs in this particular build for Windows phones, including a bug that could prevent users from receiving MMS messages.
So, if you happen to run into any problems or you simply are done testing the operating system, Microsoft has an application called "Windows Phone Recovery Tool" for PCs that will allow you to rollback to Windows Phone 8.1 from Windows 10 Mobile.
Windows Phone recovery tool
Below you'll find all the steps to help you go back safely to your previous version of the mobile operating system:
Note: Before proceeding it is worth pointing that with the release of Windows 10 Mobile build 10080, Microsoft has updated the Windows Phone Recovery Tool, now at version 2.0.3, and it is introducing support for the HTC One (M8) to Windows 10.
  1. Download and install the latest version of the Windows Phone Recovery Tool to your PC.
  2. Launch the recovery tool and connect your phone using a USB cable. If your handset isn't detected, click My phone was not detected to force the application to rescan for and detect the phone.
  3. In the next screen, click your phone, wait a few seconds, and you'll see your phone information and the software available for download to roll back to a previous operating system. To continue, click Reinstall software.
  4. Next, the recovery tool will warn you to backup all your data, settings, and apps before continuing, as the rolling back process will delete all the previous data in your phone. ClickContinue to proceed.
  5. Now, the recovery tool will download the image from Microsoft's servers and replace Windows 10 Mobile that is currently on your phone. The process will take some time depending on your internet connection and the hardware in question.
After the tool completes the process, you will receive a message saying "Operation successfully completed". At this point, the phone will reboot and you will have to go through the Out-of-Box-Experience, like on any version of Windows. Then, you'll need to sign-in with your Microsoft account, select to restore your phone from backup (if this is something you prefer), and after a few additional questions, you'll be back to Windows Phone 8.1.
As you can see, Microsoft is making it very convenient to roll back to Windows Phone 8.1 from Windows 10 Mobile preview, and the company is starting to add support for non-Lumia devices, which is a big plus. So you don't have to spend time searching on the internet for different tools to go back to the previous operating system.
However, you have to remember that the operating system is far from complete. Not only will you find issues, but you might also stumble upon problems trying to roll back, as I hear many users reporting issues restoring Windows Phone 8.1 on their Lumia 930. As such, you should avoid using Windows 10 Mobile preview as your primary mobile operating system, at least until it hits RTM.

Friday, 31 July 2015

Microsoft took to a blog post this evening to talk a little bit about the first 24 hours of the Windows 10 rollout, noting that the OS is now on 14 million machines, and reiterating some support channels through which users can ask questions about their upgrade if you run into issues. From Microsoft:


As we've shared, our top priority has been ensuring that everyone has a great upgrade experience, so, we are carefully rolling out Windows 10 in phases, delivering Windows 10 first to our Windows Insiders. While we now have more than 14 million devices running Windows 10, we still have many more upgrades to go before we catch up to each of you that reserved your upgrade. Rest assured we are working 24×7 to continue the upgrade process and are prioritizing the quality of your upgrade experience over anything else. We are grateful for your excitement and enthusiasm and we appreciate your patience over the days and weeks ahead as we carefully roll out Windows 10 in phases to all of you that have reserved.


That's quite the impressive number for just the first 24 hours, and it will be interesting to see how widespread adoption becomes in the coming weeks.

Microsoft also took the opportunity to highlight the positive reaction that Windows 10 has enjoyed from reviewers so far, and showed off some of the company's favorite pictures from launch events that took place around the world. If you'd like to reminisce over the past 24 hours and look into the support channels that Microsoft has set up for the launch, you can read the full blog post at the source link below.